When we first saw the kitchen, we both decided quickly that it was adequate but not our taste. But we knew it had to suffice for at least six months, so we set out to make it more usable.
First to go was one of the two wall mounted cupboards that made the room feel claustrophobic and heavy, together with the rather useless ‘breakfast bar’. That gave us space for our fridge-freezer.
The built-in appliances (washer, slimline dishwasher, fridge, freezer & oven) meant there was very little storage space. The fridge, freezer and washer were all pretty skanky so they make their way to the tip right away. Which gave us 3 x 60mm wide cupboards for storage, albeit without doors. (We’re using the ‘slimline’ dishwasher although you can hardly get any pans in it.)
We really don’t like the sink – black, angular and plasticky, and never looks clean.
And the worktop, although wood (which was what we had in our last home and loved it), was badly marked and very washed-out looking. Covered in black rings, as if someone just couldn’t bothered to worry about burning the surface.
We knew from a minor bit of Zoopla research that the kitchen (and the bathroom, slightly more worryingly) had been re-fitted in 2009, in preparation to sell. From the photos online, clearly nothing has been done to the flat since then, and it appears the various inhabitants hadn’t once oiled the worktop.
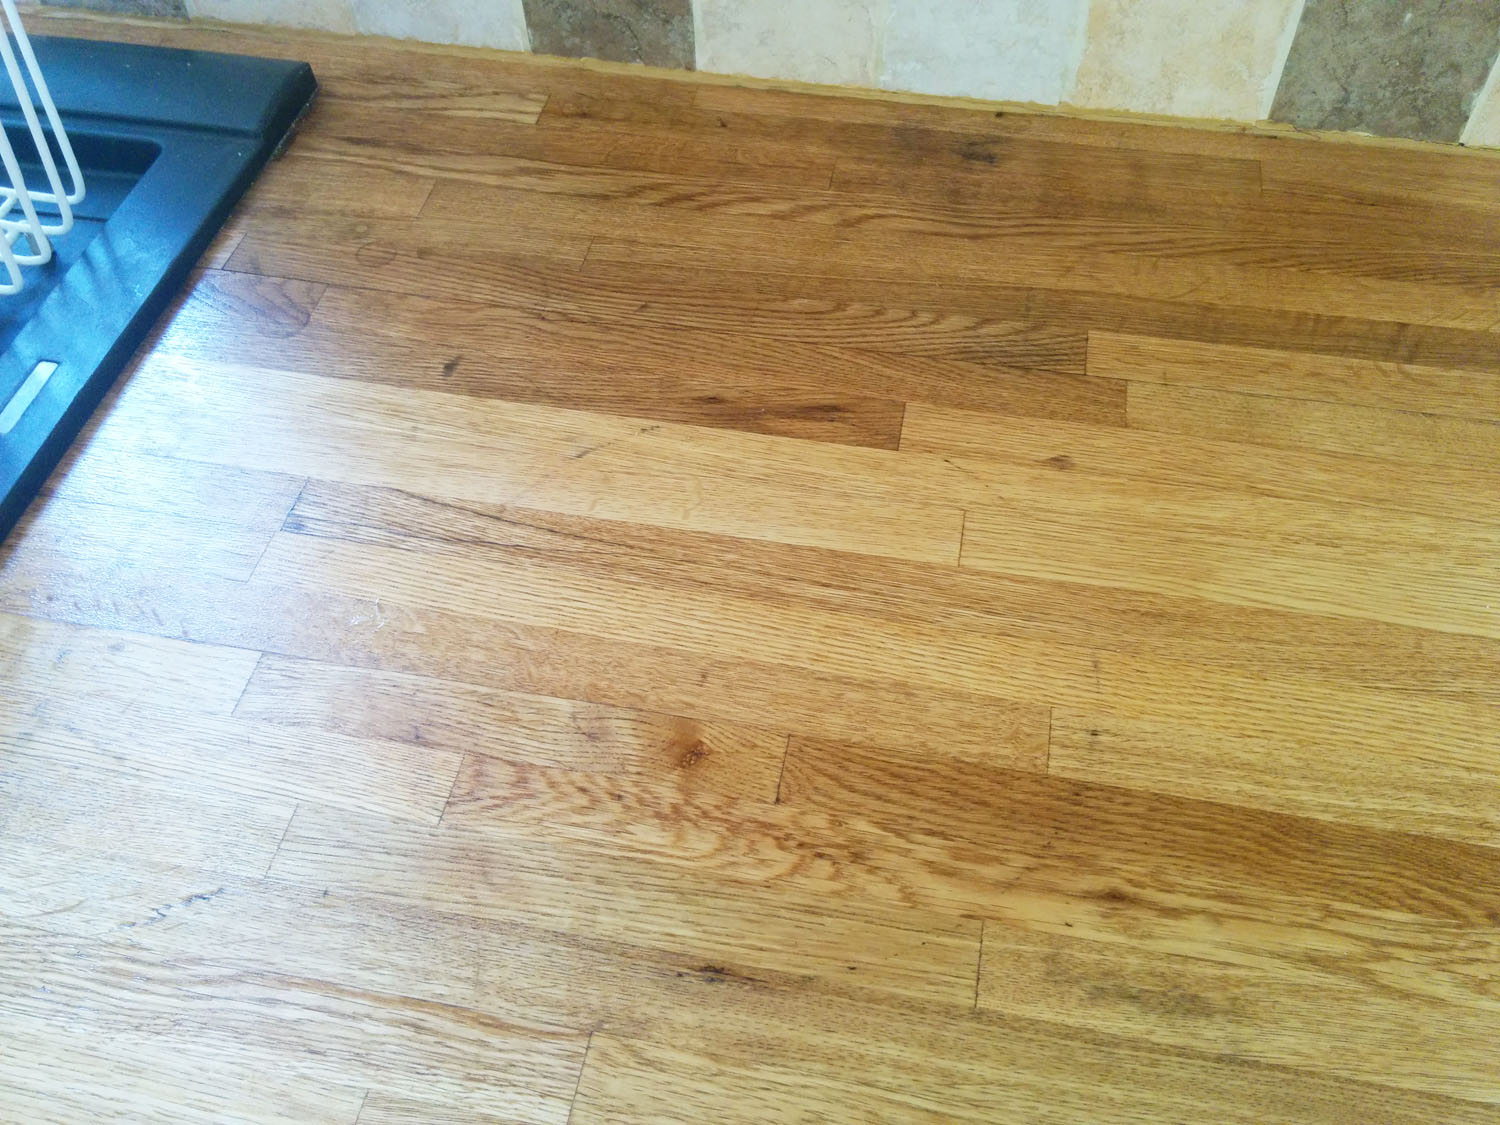
Our plan has always been to renovate the kitchen in the autumn so it didn’t seem worth worrying about trying to remove the stains and burns from the worktop. However, a funny thing has happened – we’ve started to like quite a lot of things about the kitchen, so much so that we’re now thinking of rescuing and re-using the oak worktop. Which was why yesterday I had a go at sanding down and oiling the worktop to see if it was a DIY job. Here’s how one of the worst stains looked:

After a bit of hard graft with the sandpaper, I was getting somewhere:

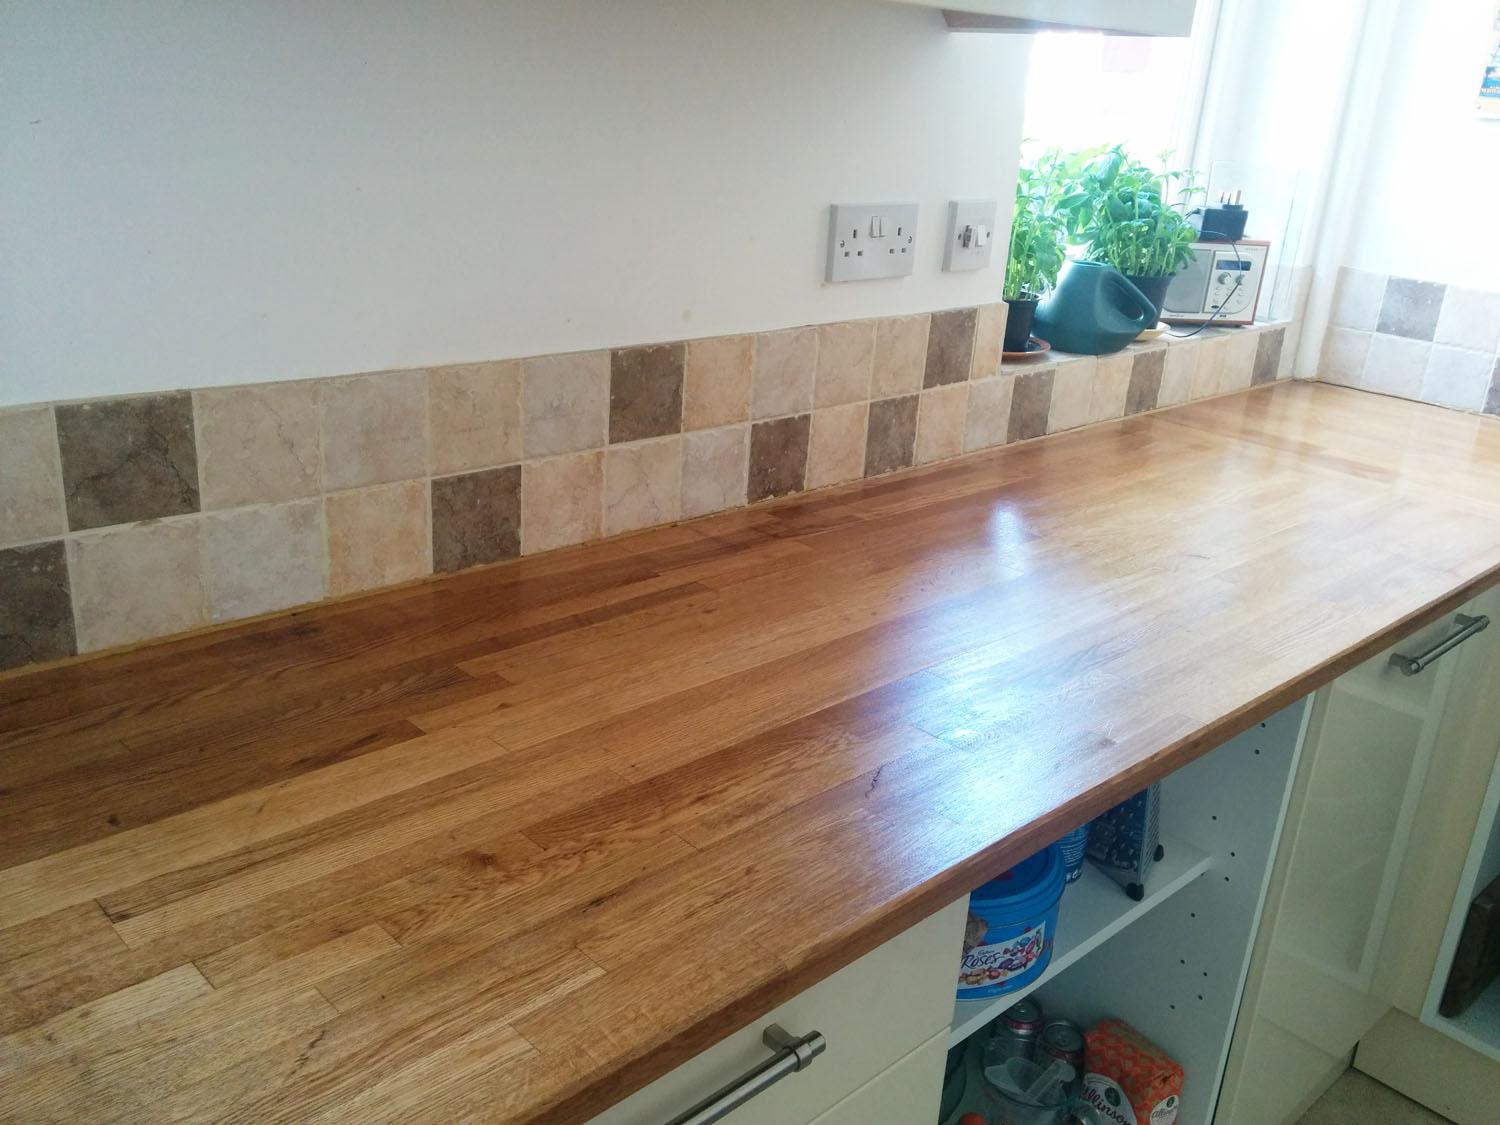
I probably should have kept going at this stage, but my shoulder is starting to ache from all the DIY and I was quite pleased to have made this amount of progress! After tackling the other stains, wiping down and using a medium paper to do a final light sanding of the whole top, I then gave it a good oiling with worktop oil. See what you think:
I was pretty chuffed with this, and a couple of coats of oil later the whole run of worktop was looking much happier:
I can’t wait to take a chisel and mallet to those tiles!
Discover more from An Eastbourne Diary
Subscribe to get the latest posts sent to your email.
[…] left where the appliances were, and although they had no doors, they were essential storage. I did a bit of renovation on the wooden worktops and at one point we even considered keeping and recycling them in the new kitchen. And that was our […]